Microsoft Teams setup
The Microsoft Teams connector lets your workspace's agent answer messages inside Teams. This guide walks you through registering a bot in Azure, pointing it at your CubePlex host, making it installable in Teams, binding it to your CubePlex workspace, and linking your account so the bot answers you.
Teams is the one platform that requires a publicly reachable CubePlex host. Unlike Feishu's long connection or the Slack / Discord / DingTalk gateway connectors — where CubePlex opens an outbound socket and nothing on your side needs to be exposed — Teams delivers messages by webhook: Microsoft's Bot Framework service POSTs each activity to a URL on your host. That URL must be reachable from Microsoft's servers over HTTPS. If your CubePlex host is behind a firewall with no inbound access, this connector will not work.
CubePlex validates the Azure Bot Framework JWT on every inbound activity, so only Microsoft's signed requests are accepted.
Before you start
You need:
- A workspace admin or member account in CubePlex (a plain member can bind a bot that runs as themselves; impersonating another user requires workspace admin).
- An Azure account with permission to register an Azure Bot resource and a Microsoft Entra (Azure AD) application in your tenant.
- A publicly reachable HTTPS URL for your CubePlex host (see the note above).
The screen names, blade labels, and manifest editor in Azure and the Teams Developer Portal change frequently and differ across tenants. This guide describes each step by what you are configuring and gives typical portal paths. Where an exact Azure UI label is given it may have moved or been renamed — follow the capability, not the literal string. The values CubePlex actually consumes — the app ID, app secret, tenant ID, and messaging endpoint path — are the only ones this guide can state with certainty, because they come from CubePlex's own code.
The in-product Connect Teams wizard lists the same prerequisites with portal paths; this page is the long form.
Step 1 — Register an Azure Bot
In the Azure portal:
- Create a resource → search Azure Bot → Create.
- Prefer single-tenant identity when the portal asks how the bot's Microsoft App is managed (multi-tenant bot creation is deprecated for new bots).
- After deployment, open the Azure Bot resource.
Record three values from Configuration (and the linked Entra app — see steps 2–3):
| Value | Where to copy it |
|---|---|
| App ID (Microsoft App ID / Application client ID) | Azure Bot → Configuration → Microsoft App ID |
| Tenant ID (Directory / App Tenant ID) | Azure Bot → Configuration → App Tenant ID (or Microsoft Entra ID → Overview → Tenant ID) |
| App secret | Created in step 2 (Entra app → Certificates & secrets) |
CubePlex stores the App ID as the account's external identifier. It must match the Microsoft App ID you created for this bot.
Capture: The Azure portal "Create an Azure Bot" form, and the resulting resource's Configuration page showing Microsoft App ID and App Tenant ID.
Asset: /img/im/teams-azure-bot-create.png
Step 2 — Create a client secret
Secrets and Graph permissions live on the Microsoft Entra app behind the bot — not on the Azure Bot blade itself.
- Azure Bot → Configuration.
- Next to Microsoft App ID, click Manage. That opens the Entra App registration.
- Certificates & secrets → New client secret.
- Copy the secret Value immediately (Azure shows it only once). Do not paste the Secret ID into CubePlex.
Capture: The app's "Certificates & secrets" view at the moment a new client secret is created, with the one-time secret value visible (redact before publishing).
Asset: /img/im/teams-app-secret.png
Step 3 — Add Graph permission (identity)
CubePlex uses Microsoft Graph (GET /users/{id}) to resolve a Teams user's email when possible. That needs an application permission with admin consent.
On the same Entra app (Azure Bot → Configuration → Manage):
- API permissions → Add a permission.
- Microsoft Graph → Application permissions (not Delegated).
- Search and select
User.Read.All→ Add permissions. - Grant admin consent for your tenant and confirm the status shows granted.
Without admin consent, token acquisition may still work for Bot Framework, but automatic email lookup fails and users must use /link.
Step 4 — Set the messaging endpoint
In the Azure Bot resource → Configuration, set Messaging endpoint to:
https://YOUR_CUBEPLEX_HOST/api/v1/im/teams/messages
Replace YOUR_CUBEPLEX_HOST with your public CubePlex host (no trailing slash on the host). Leave Enable Streaming Endpoint off — CubePlex uses the classic webhook path, not the streaming protocol.
This is the exact path CubePlex listens on. Microsoft's Bot Framework service POSTs each activity here. The host must be internet-reachable over HTTPS — Microsoft will not deliver to an unreachable or plain-HTTP endpoint.
You can set this endpoint before or after you bind in CubePlex, but the bot won't answer until both sides are in place: the endpoint must point here and the account must be bound and enabled in CubePlex (Step 7).
Capture: The Azure Bot Configuration page with the messaging endpoint field set.
Asset: /img/im/teams-messaging-endpoint.png
Step 5 — Enable the Teams channel
A freshly registered Azure Bot is not reachable from Teams until you add the Microsoft Teams channel.
Azure Bot → Channels → add Microsoft Teams and leave it Running.
Without this, the bot exists but no Teams message ever reaches your webhook.
Capture: The Azure Bot Channels page with Microsoft Teams enabled / running.
Asset: /img/im/teams-channel-enable.png
Step 6 — Put the bot into Microsoft Teams
Enabling the Teams channel (Step 5) only tells Azure that Teams is allowed to call your bot. Users still need a Teams app installed in their Teams client so they can open a chat with that bot.
Think of three IDs that must be the same Microsoft App ID from Step 1:
| Place | What to set |
|---|---|
| Azure Bot | Microsoft App ID (already set when you created the bot) |
| Teams app package | Bot ID in the app = that same App ID |
| CubePlex bind (Step 7) | App ID field = that same App ID |
If those three disagree, messages either never reach CubePlex or land on an account you did not bind.
6a — Recommended: Teams Developer Portal
-
Open Teams Developer Portal and sign in with the same Microsoft 365 / work account you use in Teams.
-
Apps → New app. Give it a display name (this is what people see in Teams, not the Azure Bot resource name).
-
Fill Basic information (short name, long name, developer info, descriptions). The portal will not let you install until required fields are complete.
-
Under app capabilities / features, add a Bot (wording varies: App features → Bot, Bots, etc.):
- Choose existing bot / enter bot ID when offered — paste the Microsoft App ID from Step 1.
- Do not create a brand-new bot here unless you intend to abandon the Azure Bot you already set up; a new bot gets a different ID and will not match CubePlex.
- Enable scopes you need: at least Personal (1:1 chat). Add Team / Group chat if people will @mention the bot in channels or group chats.
-
Save. Use Preview in Teams if the portal offers it (opens Teams with the app ready to add), or download the app package:
- Publish / Download app package (a
.zipcontainingmanifest.jsonand icons).
- Publish / Download app package (a
-
Install that package in Teams (pick one path):
Sideload for yourself (typical for testing)
- Desktop or web Teams → Apps → Manage your apps → Upload an app → Upload a custom app → choose the
.zip. - If you only see “Contact your admin”, your org has turned off custom app upload — ask a Teams admin to allow custom apps for you, or use org catalog upload below.
Org catalog (for others in the company)
- Teams admin center → Teams apps → Manage apps → Upload new app (or equivalent) with the same
.zip. - Users then find the app under Apps in Teams and install it.
- Desktop or web Teams → Apps → Manage your apps → Upload an app → Upload a custom app → choose the
-
After install, open the app → Chat (or search the bot by the display name) and send a message. That should hit your messaging endpoint once CubePlex is bound (Step 7).
Capture: Developer Portal bot capability page with the Step 1 App ID filled in, and Teams “Upload a custom app” choosing the package zip.
Asset: /img/im/teams-manifest.png
6b — Optional: hand-built package
If you prefer not to use the Developer Portal:
- Create a folder with:
manifest.json(schema version and field names follow Microsoft’s current Teams app manifest docs — they change; use their template for the current version).- Two PNGs Microsoft requires (color and outline icons; size rules are in those docs).
- In the manifest, set the bot’s id to the App ID from Step 1, and enable the chat scopes you need (personal / team / groupChat).
- Zip the contents of the folder (the zip root should contain
manifest.jsonand the icons, not a nested extra folder). - Upload that zip the same way as in step 6a (Teams client sideload or admin center).
CubePlex only cares that the bot id in the package equals the App ID you bind. Icon layout and optional fields are Teams packaging requirements, not CubePlex fields.
Checklist before you message the bot in Teams
- Azure Bot Channels includes Microsoft Teams (Step 5).
- Messaging endpoint points at CubePlex (Step 4).
- Teams app bot id = Azure Microsoft App ID.
- App is installed for your user (sideload or catalog).
- CubePlex Teams account is connected with that App ID (Step 7).
- First-time identity:
/linkif prompted (Step 9).
Step 7 — Bind the bot in CubePlex
In your CubePlex workspace, open IM connectors and connect a new Teams account:
| Field | Required | Notes |
|---|---|---|
| App ID | Yes | Microsoft App ID from Step 1 (Azure Bot → Configuration). |
| App secret | Yes | Client secret Value from Step 2 (not the Secret ID). |
| Tenant ID | Yes | Directory (tenant) ID from Step 1. |
| Run identity | Yes | self by default. Binding as another user requires workspace admin. |
The delivery mode for Teams is always webhook — CubePlex sets it for you.
On binding, CubePlex validates credentials with a client-credentials token request to Microsoft (https://login.microsoftonline.com/<tenant-id>/oauth2/v2.0/token). Wrong App ID, secret, or tenant ID fails with "could not validate Teams bot credentials". Credentials are stored encrypted.
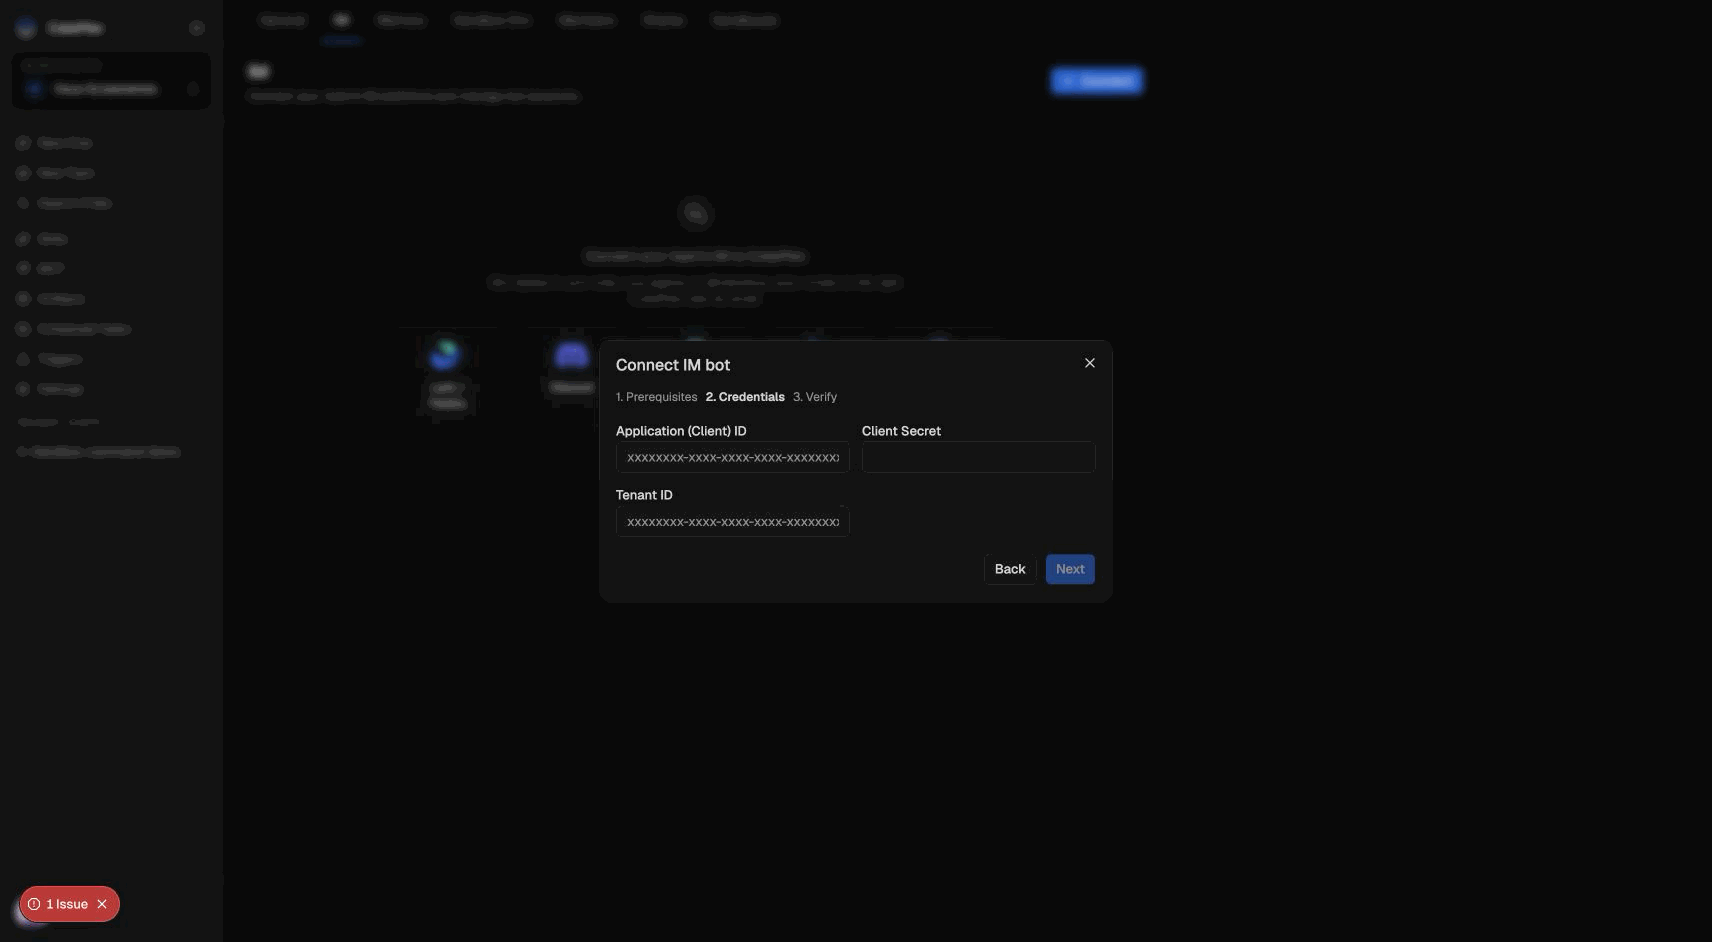
After a successful connect, the account may show Disconnected until Microsoft has delivered at least one activity in the last hour — that is expected for webhook mode. It does not mean the bind failed.
Step 8 — Test with Azure Web Chat
Before installing the bot in the Teams client, you can exercise the same webhook from Azure’s Test in Web Chat. It uses the messaging endpoint from Step 4 and the CubePlex bind from Step 7 — no separate URL is required.
- Finish Steps 1–5 and Step 7. The messaging endpoint must point at a running, publicly reachable CubePlex host.
- Open the Azure Bot resource → Test in Web Chat.
- Send a message. CubePlex should receive it at
POST /api/v1/im/teams/messages. - On first contact, complete identity linking (
/link, Step 9). Then send a normal question and confirm you get a full agent reply.
Replies in Web Chat appear as a single message when the run finishes (Web Chat does not support mid-reply message edits the way Teams does).
When that works, install the Teams app (Step 6) and message the bot in Teams the same way.
Step 9 — Link identity (first message)
The first time a given IM identity talks to the bot, CubePlex needs to know who you are.
Teams has no reliable automatic email path for every channel, so you link manually when prompted. Send:
/link your@email.com
The bot replies with a confirmation URL of the form https://YOUR_CUBEPLEX_HOST/im-link?token=.... Open that link while logged in to CubePlex, and confirm. CubePlex checks that your logged-in email matches the claimed email and that you belong to the bot's workspace, then permanently links your IM identity. See Identity linking.
The linked email must already belong to a CubePlex account that is a member of the bot's workspace — linking connects an existing account; it does not create one or grant membership.
Once linked, messages run as that user, with the same skills, memory, and tools you have in the web app, and the agent's reply posts back into the chat.
Conversation commands
| Command | Effect |
|---|---|
/link <email> | Link your Teams / Web Chat identity to your CubePlex account. |
/new | Start a fresh conversation; your next message begins a new one. |
/reset | Same as /new. |
新对话 | Same as /new (text form). |
/new, /reset, and 新对话 are equivalent. (The Chinese 绑定 alias for /link is Feishu-only.)
How inbound messages are authenticated
Every activity arrives at POST /api/v1/im/teams/messages. Before CubePlex does any work it:
- Resolves the bound bot for the activity and drops unknown bots.
- Validates the Azure Bot Framework JWT in the
Authorization: Bearer …header (including the activity'sserviceUrl). Missing or invalid tokens return401. - Confirms the account is enabled, then resolves identity and runs the agent.
Because the endpoint is public, this JWT check is the security boundary for the Teams connector — there is no separate signing secret you configure, unlike Feishu's encrypt key.
Rotating credentials
There is no in-place secret edit. To rotate the App secret (or change the App ID or tenant ID), delete the account in CubePlex and bind it again with the new values.